Upgrade Filament Project from v3 to v4 in 10 (not-so-easy) Steps
2025-08-18 Filament v4/5Filament 4 is officially released and stable! Is it time to upgrade your projects? This article will show you the recommended process, but you will also see that it may not be that straightforward.
Why v4 Upgrade May Be Complicated?
The good news: there's a Filament 4 upgrade script.
The not-so-good news: it upgrades only some things, and there's still some manual work.
Here's the main thing you need to understand:
Upgrading Filament doesn't mean upgrading ONLY Filament.
You will/may also need to upgrade:
- Filament packages to support Filament 4
- Laravel version to v11.28+ (and Laravel packages if needed)
- Tailwind version to v4.0+ (if you use custom theme or Filament components outside of panel)
- PHP version of your web-server to v8.2+
Another word of caution came from Dan Harrin himself with this post on the official Discord:

But, with all those "warnings", if you do want to upgrade as soon as possible, I'm here to help.
Let me break down the upgrade process step-by-step.
Plan of Action
I've divided the process into 10 steps.
Preparation:
- Check Filament v4 Requirements
- Check Filament Plugin Versions/Compatibility
- Read the v4 Upgrade Guide IN FULL
- Automated Tests and Git
Upgrade Process:
- Upgrade Laravel Version
- Running Filament Upgrade Script
- Filament Version Upgrade (+ Plugin versions!)
Extra Work (optional):
- Tailwind v4 Upgrade: Custom Theme
- New Filament v4 Directory Structure
- Manual Filament Structure Changes
Looks complicated, huh? But let's get into it, step-by-step.
Step 1/10. Preparation: Check Requirements
Before doing anything, check the Filament v4 requirements for minimum versions of Laravel and PHP:
- PHP 8.2+
- Laravel v11.28+
If your project/server doesn't meet those requirements now, can you upgrade those?
Also, Tailwind v4.0+ is required, but this may be optional if you do not use a custom theme. We'll discuss Tailwind separately at the end of this tutorial: it's probably the trickiest part of the upgrade process.
Step 2/10. Preparation: Read the Upgrade Guide IN FULL
All the upgrade guides are boring, I know. It's one of those things like "Terms and conditions": you may be tempted to just quickly skim through the Upgrade Guide page and move on with the upgrade script, hoping it will do the job for you.
Wrong.
You need to understand the changes before you start making them. Or, at least, you need to realize the scope of how many things may be touched when performing the upgrade.
So, please, PLEASE read the Upgrade Guide in full at least once.

Some things may not look clear right away, but you may find some things that may stop your decision to upgrade, for now.
Step 3/10. Preparation: Tests and Git
Ideally, your application should have some automated tests with Pest/PHPUnit. Upgrade scripts and manual changes will move a lot of code, making it difficult to test everything manually.
If you don't have tests, writing at least some tests while on Filament v3 may make sense. You may also ask AI to generate at least basic smoke tests before upgrading.
Finally, commit all the current changes to the Git repository so you can clearly see what has changed and rollback the changes if something goes wrong.
Ok, now you're ready?
Let's start making the actual changes.
Step 4/10. Filament Upgrade Script
You can run the Filament upgrade script when you have Laravel and PHP requirements.
composer require filament/upgrade:"^4.0" -W --dev vendor/bin/filament-v4It will automatically check the compatibility of PHP and Laravel versions.
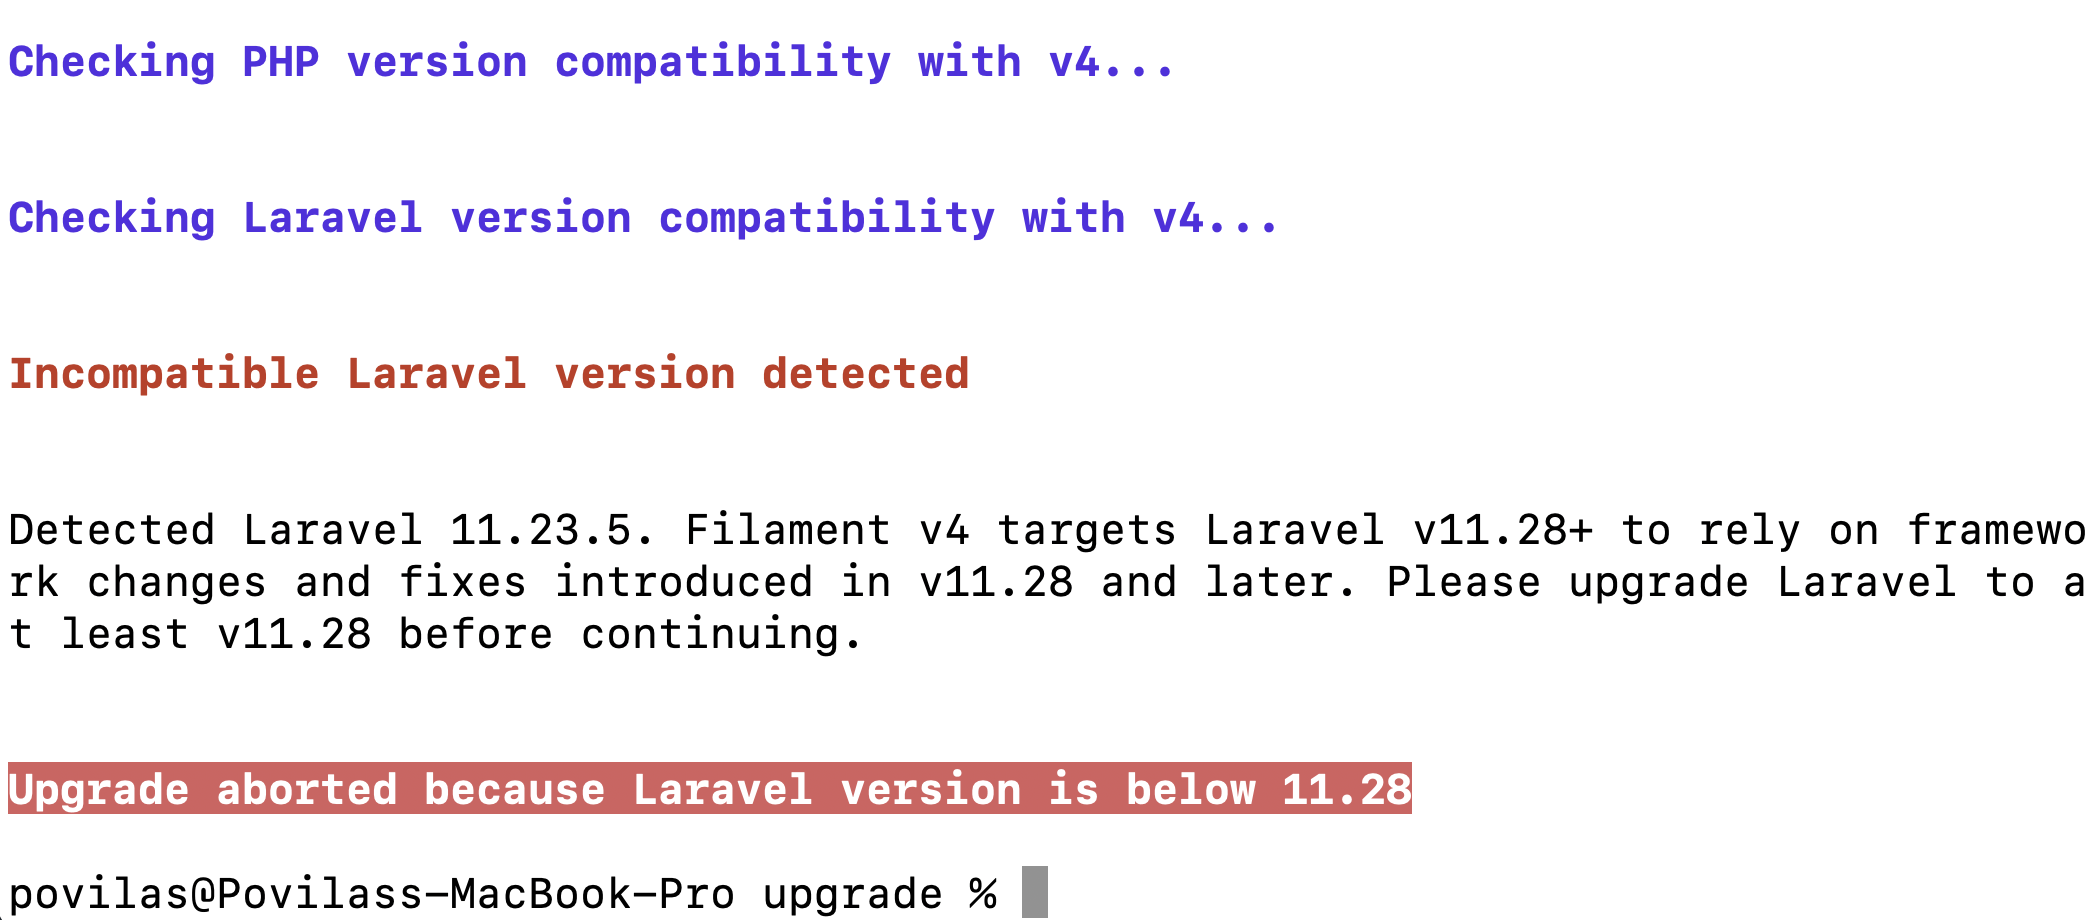
So, in this case, I need to upgrade Laravel version.
Step 5/10. Upgrading Laravel Version
Minimum required version is Laravel v11.28+. If you use Laravel 10, go straight to Laravel 12 if possible, as 11 to 12 have no breaking changes.
Of course, the easiest way to upgrade would be to use Laravel Shift for automated upgrades. Shift will also upgrade to a new app structure introduced with Laravel 11.
You can also do it manually by checking the Laravel upgrade docs or partially automating via rector rules.
In my case of Laravel 11.23.5, I just needed to run composer update to bump it to the latest 11.x version.
Back to Step 4. Upgrade Script.
Ok, Laravel updated. Again, we run this:
vendor/bin/filament-v4It will ask what folder to perform the changes in:
Please provide a comma-separated list of directories to process breaking changes in (e.g. app, app-modules, src):
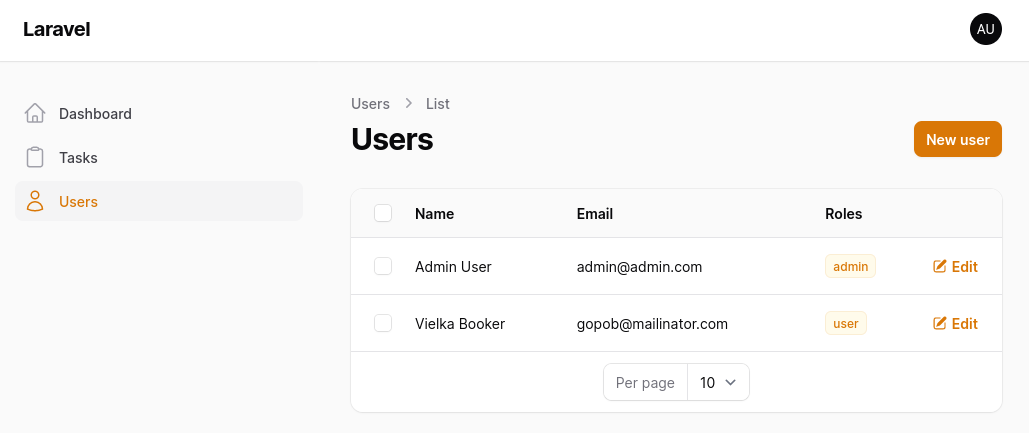
For vast majority of default Filament applications, it's app folder.

Ok, success! Now, what has it changed?
The script will handle most of the breaking changes in your application code. The script changes namespace imports, updates methods, and types. A few examples of what it does:
- In table instead of
actions()now it'srecordActions(). - In form and infolist, instead of injecting
FormorInfolistclasses, it changes to injectSchema. - Adds
\BackedEnumandnulladditional types to the$navigationIconproperty in the Resource.
At this point, if you load your page, your Filament project will probably be broken.
Don't worry, that's intended.
Because the upgrade script changed the code for v4, but not the Filament version itself. This is our next step.
Step 5/10. Filament Version Upgrade (+ Plugins!)
See the composer require commands that the upgrade script showed us?
composer require filament/filament:"^4.0" -W --no-updatecomposer require awcodes/filament-badgeable-column:"^3.0" -W --no-updateThe upgrade script automatically checks the versions of the plugins and whether they are compatible with Filament 4. Great!
In my case, it detected the awcodes/filament-badgeable-column plugin being used, but with the older version 2.3. It also detected that there's a newer v3.0 of that plugin that supports Filament 4.
See that --no-update? It's important. It will just update the version in composer.json but not run the composer update yet.
So, we run those composer require suggested, and then we run:
composer updateNow you can reload your panel and it may work with v4!
But if it doesn't, it may be about plugin syntax.
Step 6/10. Broken Panel? Check Plugins Syntax.
When upgrading plugins, you need to upgrade not only their versions, but also check their upgrade guides for other syntax changes, besides the version number.
For example, we used the awcodes/filament-badgeable-column plugin in one of our applications. In the upgrade section, it says the namespace must be updated everywhere from Awcodes\FilamentBadgeableColumn to Awcodes\BadgeableColumn.
Ok, the back-end portion of Filament should be working. Now, what about CSS?
Step 7/10. Broken Styles? Tailwind v4 Upgrade: Custom Theme (optional)
Filament v4 uses Tailwind v4 internally. If your application's frontend uses Tailwind v3, but the Filament panel doesn't use a custom theme, there's no need for an upgrade.
However, you need to upgrade Tailwind to v4 if you use:
- Custom theme in the panels
- Or, any of the Filament packages (like Filament Forms or Tables) or any Filament Blade component on your front-end, outside the Panel
You can upgrade Tailwind manually or use the upgrade tool, which should automate the entire migration process.
First, you should update the custom theme CSS file. Previously, custom theme CSS files contained this:
@import '../../../../vendor/filament/filament/resources/css/theme.css'; @config 'tailwind.config.js';Now, they should contain this:
@import '../../../../vendor/filament/filament/resources/css/theme.css'; @source '../../../../app/Filament';@source '../../../../resources/views/filament';Plus, if needed, other sources in the resources and all those from the used Filament plugins. In my case, a source should be added to the awcodes/filament-badgeable-column package and a source for tables.
@import '../../../../vendor/filament/filament/resources/css/theme.css'; @source '../../../../app/Filament';@source '../../../../resources/views/filament';@source '../../../../resources/views/tables';@source '../../../../vendor/awcodes/filament-badgeable-column/resources/**/*.blade.php';Now, the Tailwind upgrade command can be run. Before running this command, your git directory should be clean without any changes.
npx @tailwindcss/upgrade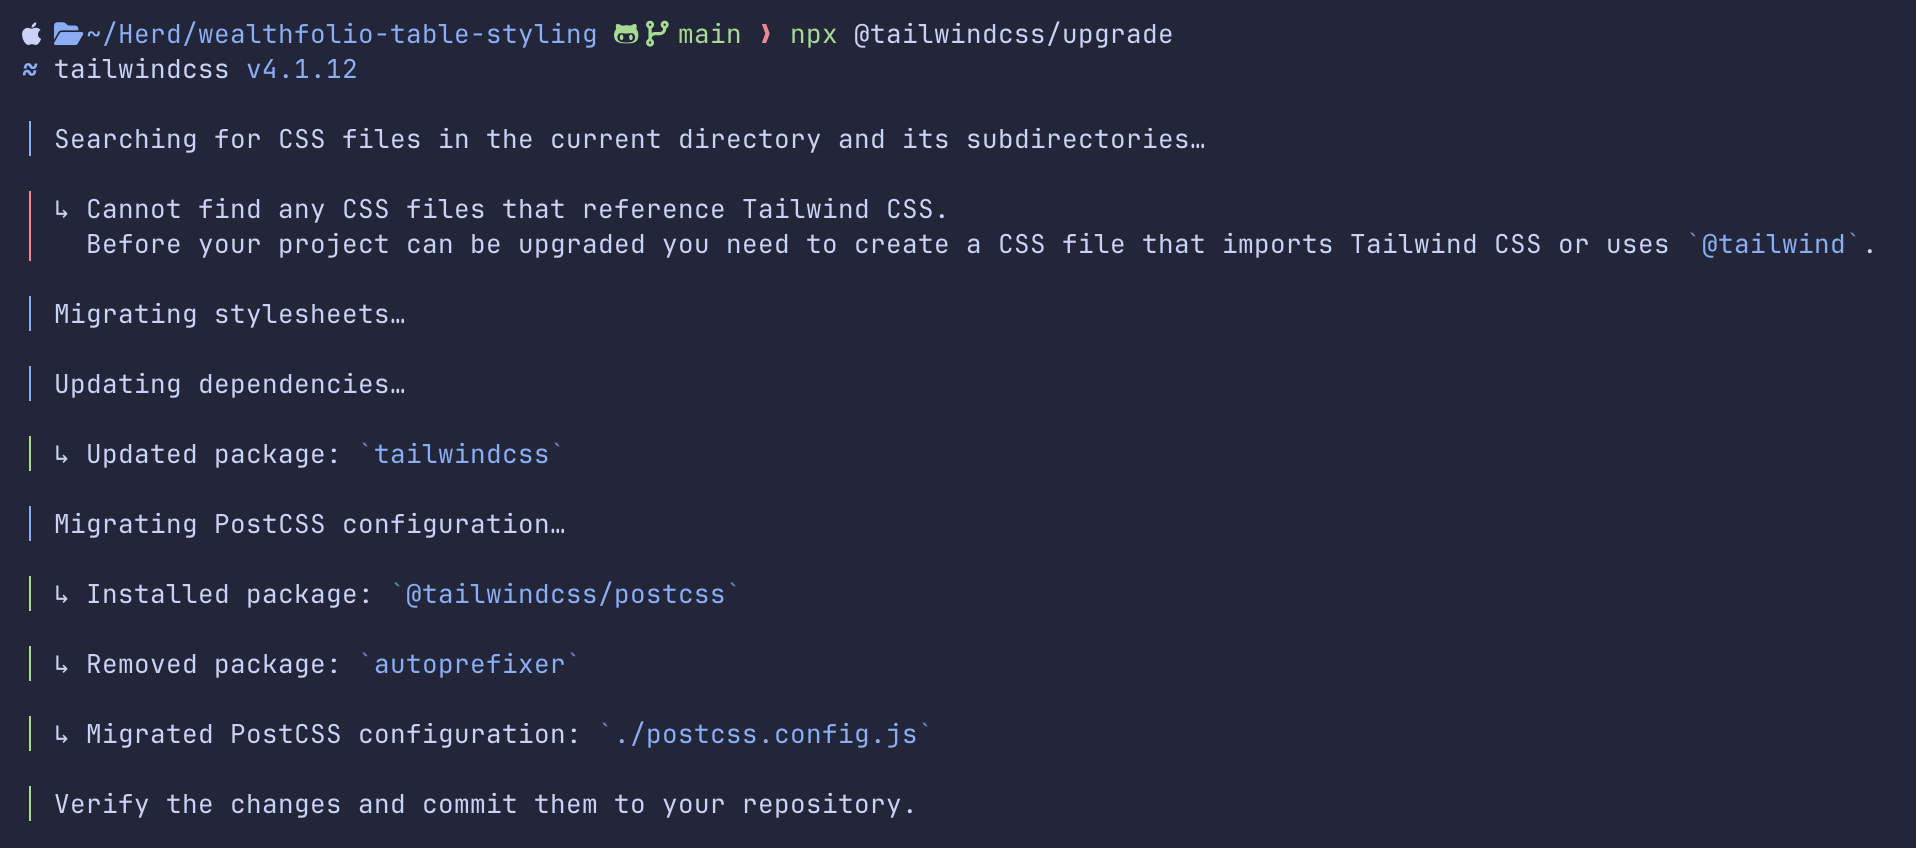
While this upgrade command works for this small project, it may not change everything in your project. Also, you should check the breaking changes section in the Tailwind docs under the upgrade guide page.
For example, an important change concerns PostCSS: in v3, the tailwindcss package was a PostCSS plugin, but in v4, the PostCSS plugin lives in a dedicated @tailwindcss/postcss package.
So, you need to run:
npm install @tailwindcss/postcssAnd then change the postcss.config.js to this:
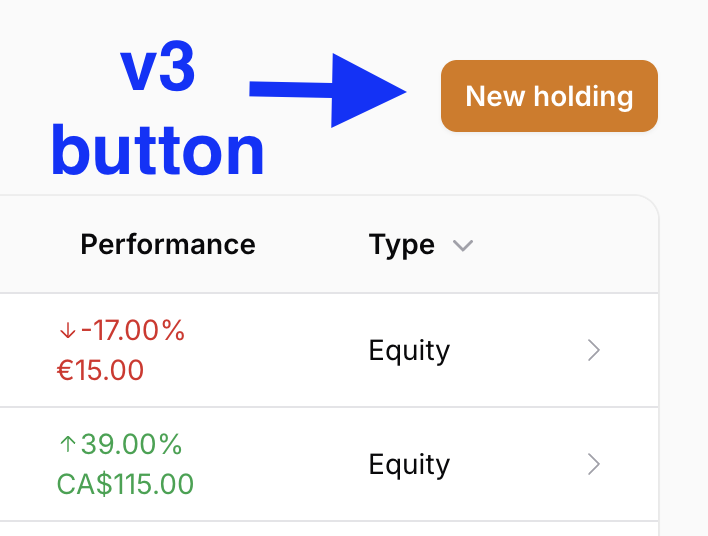
export default { plugins: { '@tailwindcss/postcss': {}, },}Then, you should finally see the project upgraded to v4. You can judge it by the color of the default v4 button.

Step 8/10. New Filament v4 Directory Structure (optional)
In addition to the main syntax upgrade script, there's also a Directory Structure upgrade script for Filament v4.
Filament v4 introduces a new default directory structure for your Filament Resources and Clusters. You may upgrade to v4 but still use an older v3 directory structure.
This structure is optional, just as when going from Laravel 10 to Laravel 11, the new Laravel 11 skeleton was optional. You may have stayed with the older file/folder structure, even on the new Laravel 11 version.
However, if you do want to upgrade to the new structure, there is an automated command inside the same filament/upgrade package.
First, run the command with the --dry-run option to see what changes will be made.
php artisan filament:upgrade-directory-structure-to-v4 --dry-run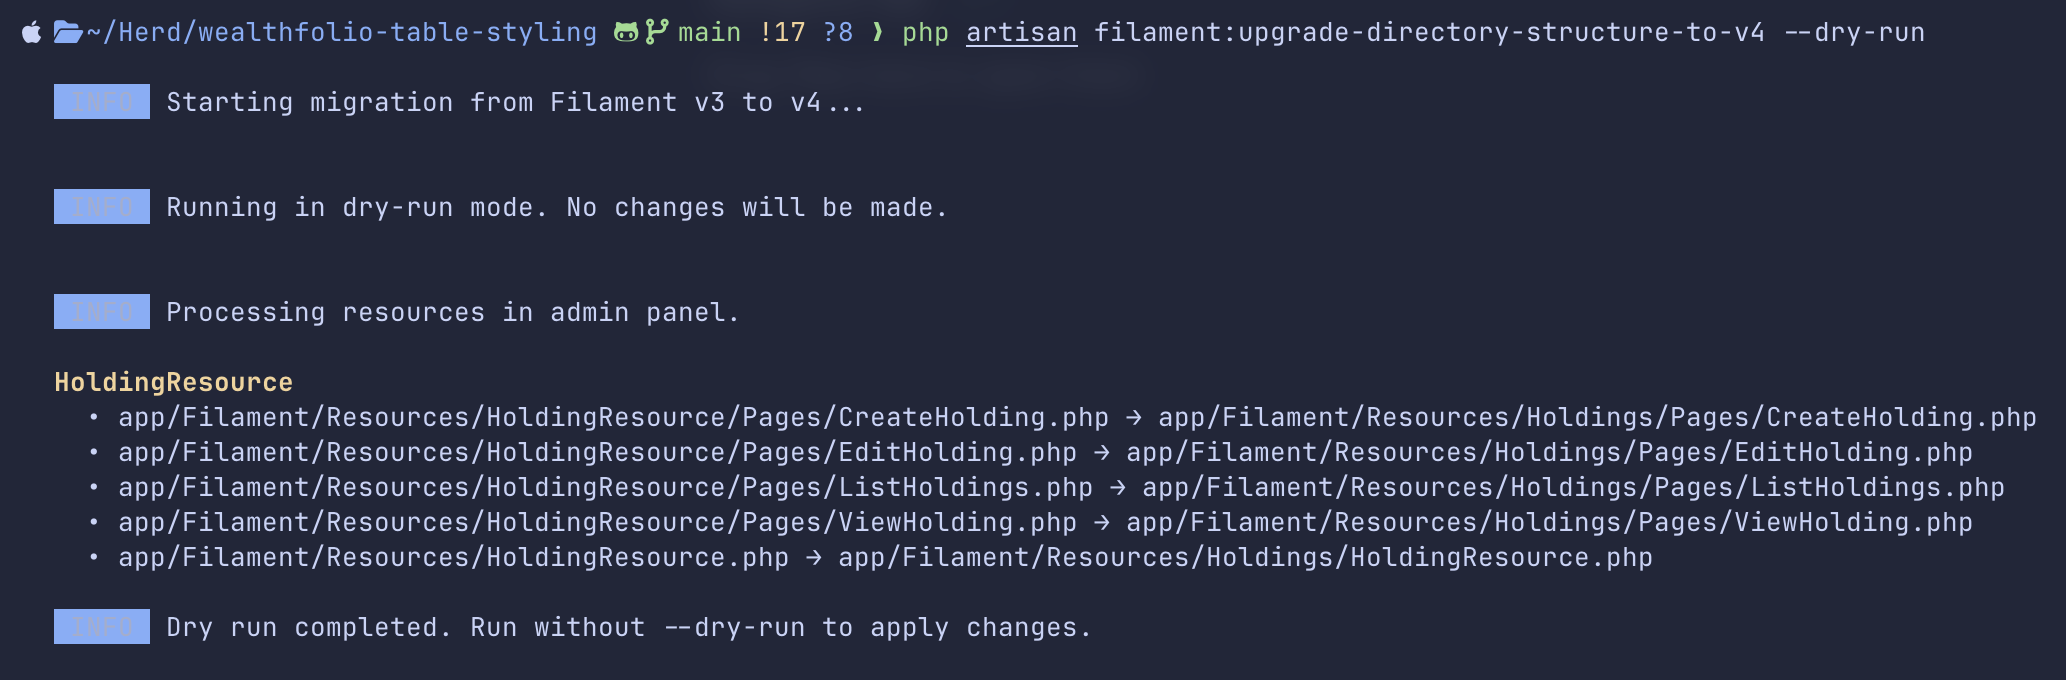
After checking the changes, they can be applied with the same command without adding the --dry-run option.
php artisan filament:upgrade-directory-structure-to-v4All done? Not necessarily.
Step 9/10. Optional Structure Changes
Even after two upgrade scripts, there may still be things to do manually.
With Filament v4, Forms and Infolists are in their own Schema classes, and tables are in their Table class. This structure is provided as a code quality tips. When upgrading from v3, at the time of writing this article, there is no automated command or script to do it.
In my opinion, the easiest way to use this structure would be to migrate one resource to it and then ask AI to analyze it and create the same structure for other resources.
Step 10/10. Cleanup
Now, we've finished the upgrade, and the filament/upgrade package can be removed.
composer remove filament/upgradeConclusion: Be Careful and Don't Hurry with Upgrade
As you can see, upgrading the project to v4 is not so smooth, especially if you use many Filament plugins or custom themes.
So, it may be a good strategy to wait until they all properly support Filament 4 and enough troubleshooting tutorials have been written, to solve potential issues while upgrading.
But if you feel brave and capable of resolving everything yourself, dive into it!
A few of our Premium Examples: